Last Updated on May 30, 2022 by Rupesh Patil
If you have bought a new Samsung smartphone, congratulations are definitely in order. Struggling to set up your Samsung Galaxy smartphone properly? Well, you don’t need to worry a single bit as we have got you covered with this detailed article. Setting up a smartphone is a fairly easy process, but it still requires a bit of knowledge to pull it off properly. In today’s article, we will help you set up your brand-new Samsung smartphone with utmost ease.
It is worth noting that Samsung smartphones ship with the company’s in-house One UI software, which comes with a slightly different startup process compared to a smartphone running the stock version of Android (like Google Pixel and Nokia smartphones).
Step-By-Step Process To Set Up Your Samsung Smartphone
- Press And Hold The Power Button To Start Your Samsung Smartphone
- Welcome
- For Your Review
- Permissions For Samsung Apps And Services
- Choose A Wi-Fi-Network To Connect To Internet
- Copy Apps And Data
- Sign In
- Google Services
- Protect Your Phone
- Get Recommended Apps
- Samsung Account
- You’re All Set Up!
Note: Our setup guide takes into account the Samsung smartphones running One UI 4 out of the box, but the setup process will be more or less the same for devices running the previous iterations of Samsung’s in-house Android skin.
1. Press And Hold The Power Button To Start Your Samsung Smartphone
The first thing that you need to do is to locate the power button of your Samsung smartphone. You need to press and hold the power button of your phone until you receive haptic (vibrational) feedback and the Samsung logo is visible on the screen. The moment you do, you can release the button and the setup process of your Samsung smartphone will begin.
2. Welcome
Your new Samsung smartphone will greet you with a welcome text. The welcome screen lets you select your preferred language. By default, English (India) is the selected language, but you can change it as per your personal preference.
Furthermore, you can make emergency calls directly from this screen. The welcome screen allows you to tweak various accessibility settings, such as text size, text contrast, colour inversion, screen zoom, assistant menu, and more. Once you are done adjusting these settings, you can press the Start button.
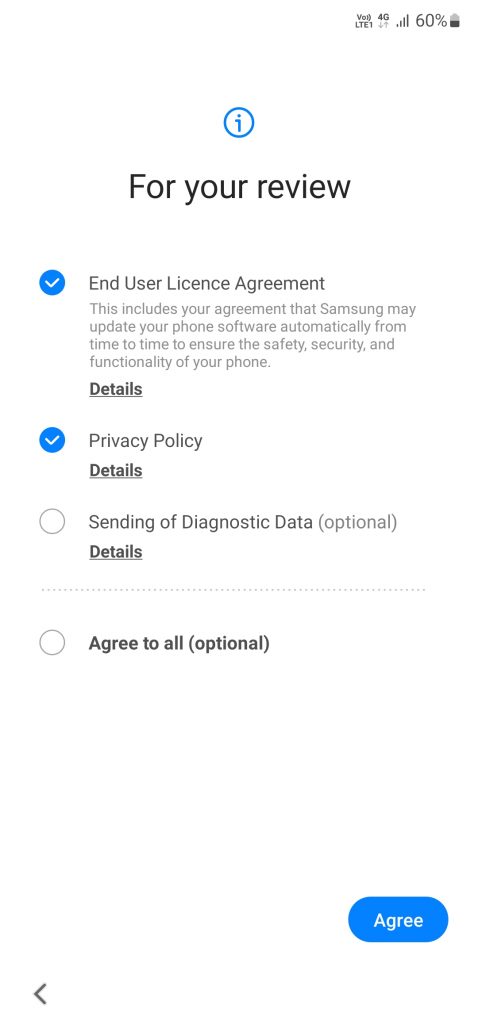
3. For Your Review
Your new Samsung smartphone will ask you to agree to various agreements, such as an End User Licence Agreement, the company’s Privacy Policy, and Sending of Diagnostic Data. While the first two things are mandatory and you need to agree to them if you want to use the phone. You have the option to allow/deny permissions to send diagnostic data, and frankly, we would deny this permission.
Your smartphone will give you an option to “save” some time and Agree to all, but we would urge you to go through the documents carefully before agreeing to the terms.

| Permission | Required? |
|---|---|
| End User Licence Agreement | Yes |
| Privacy Policy | Yes |
| Sending of Diagnostic Data | No (optional) |
4. Permissions For Samsung Apps And Services
Your Samsung smartphone will now require you to grant/deny permissions to various services which allow for proper continuity of your smartphone. Though most of these services are more or less duplicates of what Google already has in store, there is no harm in giving permissions to these services. Once you have made your decision, you can tap the Agree button and move to the next menu.
5. Choose A Wi-Fi Network To Connect To Internet
Your new Samsung smartphone will now let you choose from the list of available wireless networks. If you want to connect your smartphone to Wi-Fi, you can do so right away by selecting the network of your choice and entering the valid network credentials. Do note that open networks don’t require a password.
If you don’t want to connect to Wi-Fi right away and/or you don’t have a network available in proximity, you can always do so later on, once the setup is done, and skip to the next step for now.

Also Read: How To Set Up Your Vivo Smartphone: Step-By-Step Process Explained
6. Copy Apps And Data
You can copy apps and data from your old smartphone to your brand-new Samsung smartphone. The process is fairly simple and is well explained. You can copy data from an old Android smartphone or an old iPhone/iPad. However, if you want to start fresh, you can choose not to copy the data and skip this part.
7. Sign In
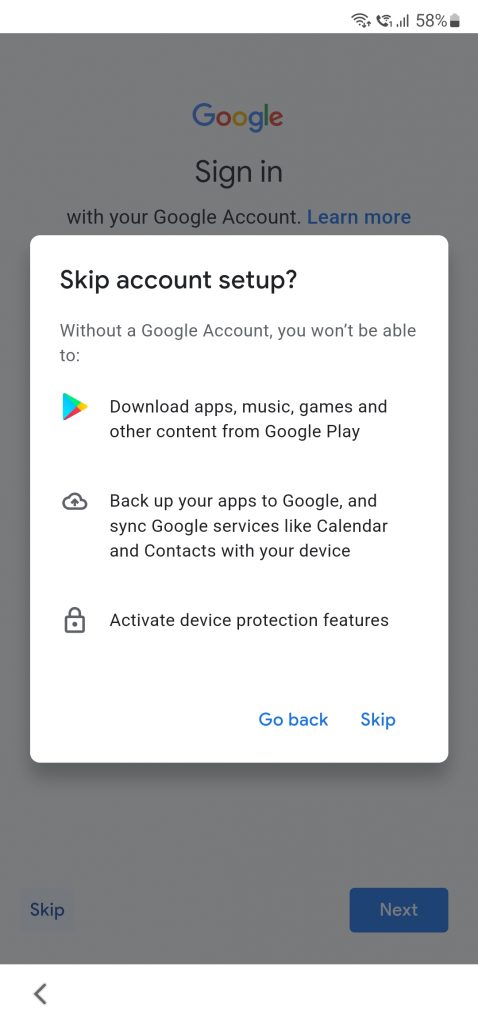
Your Samsung smartphone will now ask you to sign in with your Google Account. You can always skip this step during the setup process, but we will suggest that you do sign in, as it will let you set up your Samsung smartphone properly, and it will help you get access to various Google services, including the Google Play Store, right after the setup process is completed. That being said, don’t worry if you don’t have access to the internet during the setup process, as you can sign in later as well.

8. Google Services
Since your Samsung smartphone runs the Android operating system, it requires various Google services in order to operate smoothly. Your smartphone will now ask you to grant/deny permissions to various Google services, such as permission for the device to use location, allow scanning for Wi-Fi networks and nearby devices, and install updates and apps. You can grant these permissions and hit the Accept button.

9. Protect Your Phone
Depending on your Samsung device’s model, the options might vary, but in all likelihood, it will come with a host of protection features, including two biometric forms of unlocking (face recognition and fingerprint unlocking) and the traditional PIN/Password/Pattern mechanism. For the utmost security, you can opt for the fingerprint unlocking mechanism. As a backup, one can always set a facial unlock mechanism as well, but it is far less secure when compared with the fingerprint form of unlocking.
Both unlocking methods have to be backed up by one of the traditional unlocking methods that we mentioned above, so make sure that the PIN/Password/Pattern that you set is fairly easy for you to remember and very difficult for others to predict/find out.
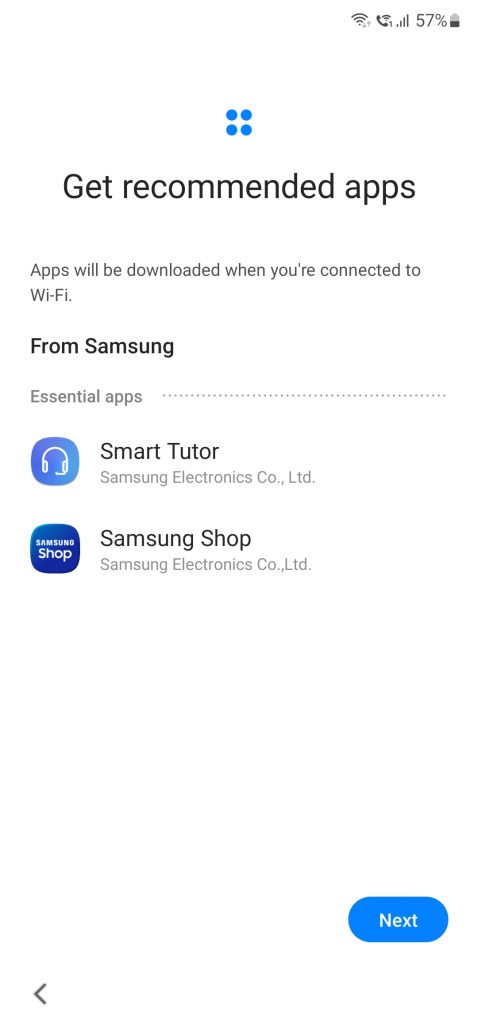
10. Get Recommended Apps
Your Samsung smartphone will now prompt you to download a bunch of recommended apps and, sadly enough, there is no option for you to skip downloading these. Once your smartphone is connected to the internet, these apps will be downloaded automatically.

11. Samsung Account
Next up, your Samsung phone will ask you to sign in to your Samsung Account. The Samsung Account lets you enjoy a host of Samsung’s in-house services, such as Bixby, Galaxy Themes, Samsung Pass, Galaxy Store, and More.
If you don’t have a Samsung Account, you can create one, and if you don’t want to sign in/sign up right away, you can skip the process entirely.
12. You’re All Set Up!
Congratulations, you have successfully set up your new Samsung smartphone. But wait, you might want to learn how to use your device before hitting the Finish button. To facilitate new users, Samsung devices come with an Explore Your Galaxy feature, which is essentially a tutorial helping you out with the interface. Once you are familiar with the interface or are already aware of it, you can start enjoying your Samsung smartphone.
There you have it. We hope our tutorial helped you set up your new Samsung smartphone comfortably. If it did, don’t forget to share your feedback in the comments section down below.


Discussion about this post