Last Updated on April 28, 2021 by Rupesh Patil
Microwave ovens are still a rarity in most Indian homes. In 2013, for example, only 13% of Indian households had a microwave, but the popularity of this appliance has been steadily growing as more and more people become aware of the efficiency and usefulness of the microwave oven.
If you have a microwave oven today, you can not just reheat previously cooked food, but you can also cook food to rather satisfactory results. But the optimal use of microwave also depends on how well you maintain it. Our microwave maintenance tips will help you keep your microwave oven in top shape so it lasts longer and gives better results with every use.
Microwave Maintenance Tip #1: Placement
Most microwaves in India are countertop designs that cannot be fitted inside a cabinet. They have vents on the top and/or on the sides for effective discharge of heat. Therefore, there are multiple considerations when you are placing a microwave in the kitchen.
Distance from Wall:
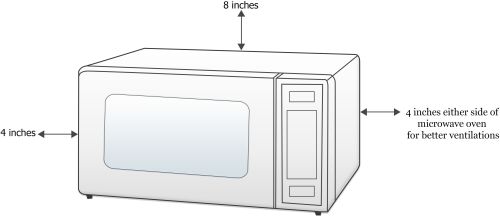
The body of your microwave heats up when you use it, and the vents you see on top or on the sides are used for dissipating the heat. To do that effectively, the microwave needs to be placed in a location that has ample space around the appliance.
If you keep the microwave too close to the wall, the heat dissipation is not done effectively any more, resulting in a microwave that takes longer to cool down after cooking, or overheating during the cooking process.
A number of microwaves now come with distance limiters, i.e, strips of plastic that tell you how far from the back wall the microwave needs to be. Even if you do not have such limiters, a good thumb-rule is to keep the microwave at least 3-inches away from the rear wall.
On the sides too, there should be a distance of at least 3-5 inches from the microwave to the wall. Ideally, keep the top of the microwave free. To be safe, check the manufacturer’s instructions on the manual to know how much clearance your particular microwave needs.
Electrical Socket
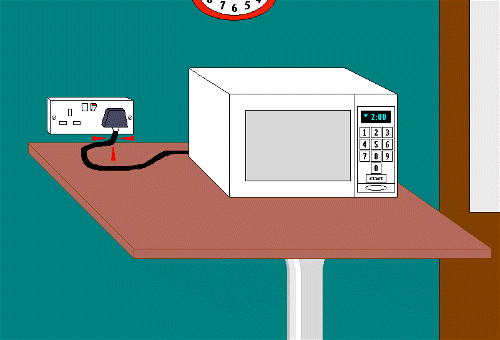
Place your microwave in such a way that the electrical socket is within easy reach of the wire.
Under no circumstance should the wire be pulled excessively to reach the socket, and it should not be loose. The wire should not be coiled on top of the microwave or hang too close to the sides when the microwave is in use.
Other Heat/Water Sources: Do not keep the microwave too close to the gas oven or the kitchen sink where water can splash on it. Keeping it close to a hot part of your kitchen may interfere with the heat dissipation or heat the sides of the microwave, which may become risky.
Also, if you keep it close to a source of water, or at a place where water can splash on it when it is in use, you run the risk of shorting or electrical hazard.
Microwave Maintenance Tip #2: Regular Cleaning
A regular cleaning of your microwave is absolutely essential to keep it running optimally.
Daily Cleaning:
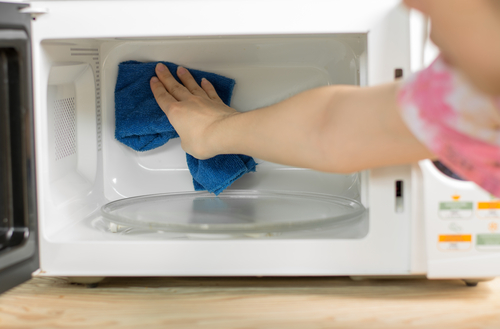
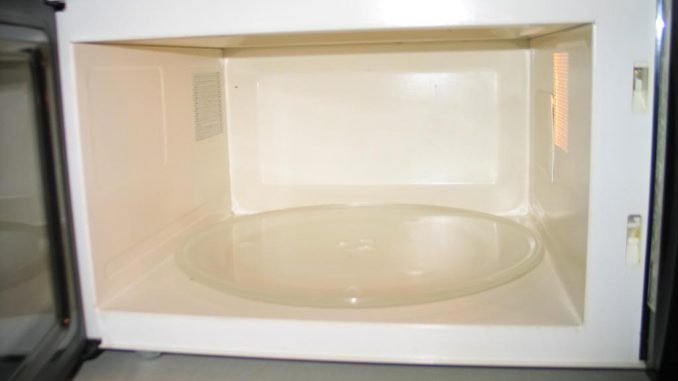
After every use, turn off the microwave and unplug it from the socket. Wait for it to be completely cool and wipe down the insides with a damp cloth. Please wait till your microwave is completely cool before you do this.
It will take care of any splatters that happened during the cooking/reheating process before they get a chance to become caked on the interiors.
This is important because if there are food particles and splatters on the inside of the oven, they will take up some microwave energy the next time you run your appliance, and this can reduce efficiency.
Also, if you are not using the microwave for even a day after such splatters happen, germs might grow on them on the interior of the oven, making it very unhygienic.
Weekly Cleaning:
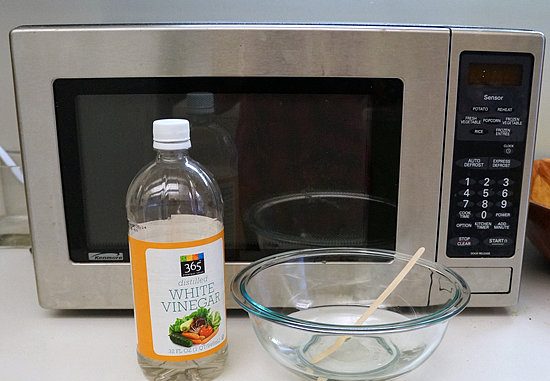
Once a week, give your microwave a proper cleaning. You can use homemade cleaners for doing this. You can use vinegar or lemon to clean the microwave. Put a bowl of vinegar with 1 teaspoon of white vinegar and turn on your microwave for a couple of minutes.
Alternately, put two halves of a cut lemon on a microwave safe plate with a little water and run your microwave for a minute. Then, turn off the microwave, unplug it, and remove the turntable. Use a soft cloth or paper towel to completely wipe down the insides.
Wash and wipe the turntable like you would clean a glass plate in the sink. For tough stains, apply some lemon juice with vinegar and leave for 5 minutes before you scrub them off.
You can also use a regular dish washing liquid to clean the interiors and exteriors of the microwave. Be sure to clean the ceiling and walls, but do not take the damp cloth near the turning unit. You can also use baking soda and water to clean and deodorise your microwave.
Keep the door open and the microwave unplugged before it completely dries up before you use the appliance again. Please wear gloves when you clean the microwave with hot vinegar/lemons/baking soda.
Microwave Maintenance Tip #3: Use Correct Dishware
One way to maintain your microwave is to use the correct dishware for reheating or cooking. This ensures that the correct amount of microwaves hit your food, and there is no damage either to the food or the microwave oven itself when you use it.
What You Can Use:
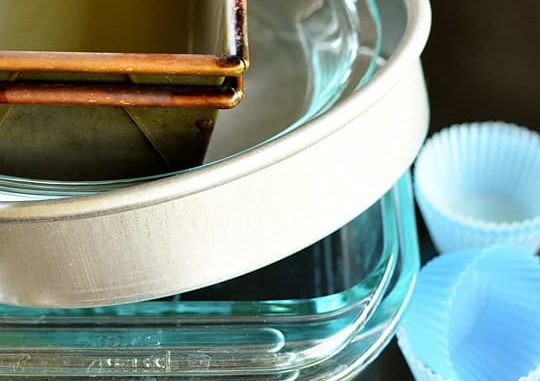
Any utensil that is recommended for microwave use comes with a marking below. In general cases, the items you can use in a microwave oven are glass and ceramic dishes, plastics marked as microwave-safe, paper towels, wax or parchment paper, aluminium or stainless steel baking trays and pans marked safe for extended use in a convection setting and silicone.
Typically, use a metal container/tray to bake breads, cookies, muffins, tarts and cakes or roast meat and vegetables. Glass and ceramic pans are best for casseroles and pies (or anything savory, since sugar tends to burn easily in glass pans).
Silicone pans are good for very light-colored cakes, breads and muffins when sticking is an issue. Plastic containers marked microwave-safe are good for reheating, but opinion is largely divided about whether or not you should at all use plastic for such high temperatures.
In the convection mode, you can use aluminium foils and cling film but not in any other mode.
What You Cannot Use:
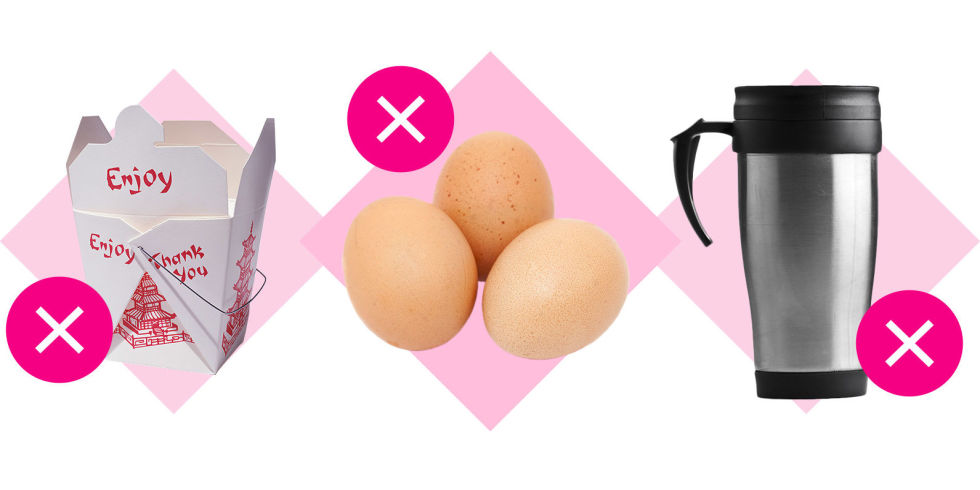
Wooden pans or anything with a wooden handle. You also cannot use any pan that has adhesive designs or dishes with metallic paint or trim. You also cannot use brown paper bags or foam-insulated containers.
You can read about microwave-safe dishware and how to test if they can really be used in the microwave here.
Microwave Maintenance Tip #4: Know What Can Go In It
Knowing what food can go into a microwave can prevent disasters in the kitchen. Experts, for example, recommend never to use a microwave for heating water. Extremely high temperatures in the microwave can superheat the water.
However, in the absence of what is called a nucleation point, there are no bubbles formed to indicate that the water is very hot. When you bring out the container, the superheated water is disturbed and this can cause an explosion leading to severe burning to you, and damage to the microwave.
Always use a kettle to boil water.
Likewise, eggs should never be heated in a microwave. You also cannot use potatoes, chilly peppers or hot dogs in the microwave because they stand the risk of exploding under such high heat. Heat is trapped on the inside and causes these items to explode out of their skins.
In order to prevent damage to the microwave and injury to yourself, please know what food items can and cannot go into the microwave.
Microwave Maintenance Tip #5: Take Care of the Door
Often microwave users use the elbow to slam the door shut because the hands aren’t free. However, this is a very risky thing to do because when a microwave door latches shut, there are 3 different switches that need to close in a particular order.
You do not seem them at work, but these switches have to close and open in sequence to let the microwave know that the door is closed or open.
Slamming the microwave door shut or closing it too hard might damage one or all of the switches. While these switches can be repaired by an authorised serviceman, please know that the repairs are not really cheap. Each switch will cost between Rs. 800 to Rs. 1000. It is recommended that you close and open the microwave gently.
Also make sure that when you open the door, it does not slam against a wall or other obstruction so as to prevent damage to the exterior.
Microwave Maintenance Tip #6: Do Not Run Empty
Unless you are using the convection mode to preheat your microwave, never run it empty. When you use the microwave in a convection mode, the microwave operates like any other oven and does not use microwave heat. This makes it possible to run it empty.
On the other hand, when the microwave mode is on and there is no food inside the oven, the microwaves are absorbed by the walls and magnetron inside the oven. This can severely damage these parts and repairs can be costly.
Always put food inside the microwave oven before you run it.
Microwave Maintenance Tip #7: Know When to Call for Help
Microwaves are complex appliances. The capacitor, for example, can maintain a large amount of charge even after you unplug the microwave. Apart from routine cleaning, you should not attempt to repair any part of the microwave oven yourself.
A microwave can give you any number of mechanical or electrical failures, and the best way to deal with these is to call an authorized serviceman for repairs.
Microwave Maintenance Tip #8: Get Extended Warranty
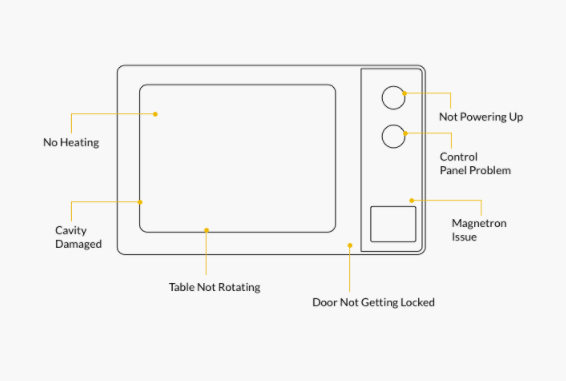
Issues with a microwave can range from small to major. From a simple fix is a blown light bulb to turntables not turning and blown magnetron, any problem in the microwave needs to be looked into by an authorized serviceman. This can get costly.
A manufacturer’s warranty will cover your microwave oven for a year in most cases, but beyond that, any repairs will have to be paid for by you.
The best way out of this is to get an Extended Warranty for your appliance. An Extended Warranty will take care of multiple issues, and do this at the convenience of your time and place. Any replacement will only be done with genuine spare parts, and in general, extend the life of your microwave.
When you are purchasing your microwave, therefore, invest a little more and buy an Extended Warranty for your appliance, so you can ensure longer protection for it.



Discussion about this post