Last Updated on May 9, 2022 by Abid Iqbal Shaik
If you’re planning to buy the best gaming PC build under ₹1 lakh, this might not be the best time to do so due to the inflacted prices of the PC parts as a result of semiconductor shortage. However, if you still want to go ahead, this is the article you were looking for. In this post, we will help you in building a gaming PC under ₹1,00,000 that is powerful enough to push more than 120fps in most of the graphics-intensive games at 1080p resolution with highest graphics settings.
However, you can build such a PC under ₹1,00,000 only if you spend the money in the right places. Nowadays, many people spend money on the looks of the PC rather than spending more on critical parts. They waste money on getting components with RGB lightning rather than getting a powerful CPU or GPU. Well, we aren’t going to do that mistake. We have compiled a list of parts that are focused only on providing the best performance for the price.
Subscribe to Onsitego
Get the latest technology news, reviews, and opinions on tech products right into your inboxComing to the build, we will be spending the majority of the budget on the GPU. After all, it is what drives the games. Sure, the gaming performance also depends on other parts but those components don’t contribute to the gaming performance as much as a GPU does. So, we aren’t going to spend much on other components. That being said, rest assured, our cost-cutting will not bottleneck the build in any way.
Let’s get started.
Configuration For The Best Gaming PC Build In India Under ₹1,00,000 (Updated for 2022)
PC Part | Model | Price |
CPU | Intel Core i5-12400F | |
Motherboard | MSI PRO B660M-A | |
RAM | ADATA XPG GAMMIX D30 DDR4 3,200MHz 8GBx2 | |
GPU | ZOTAC GAMING GeForce RTX 3060 Ti Twin Edge | |
SSD | Kingston NV1 500GB NVMe | |
PSU | Corsair CX650F | |
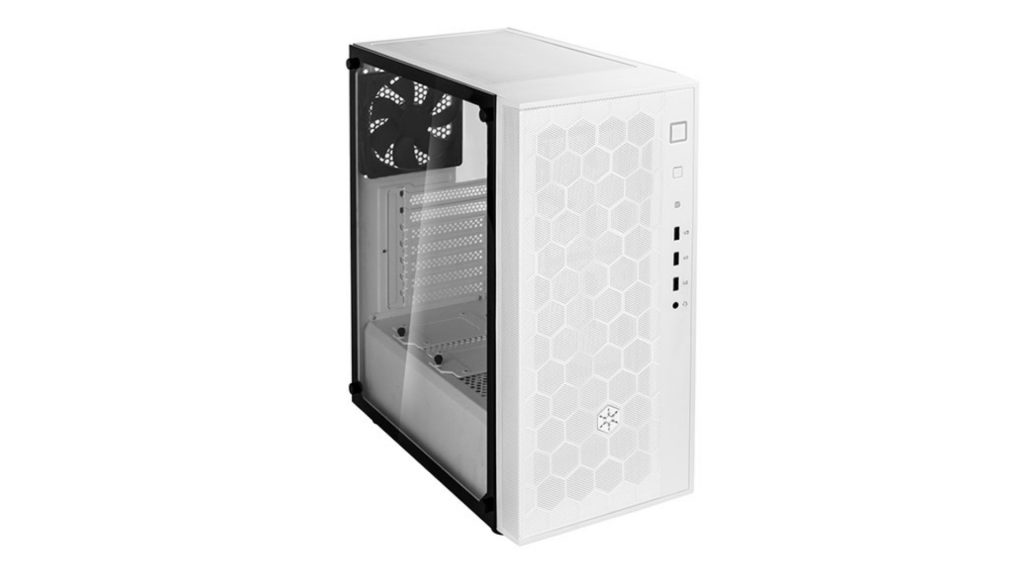
Case | SilverStone FARA R1 | |
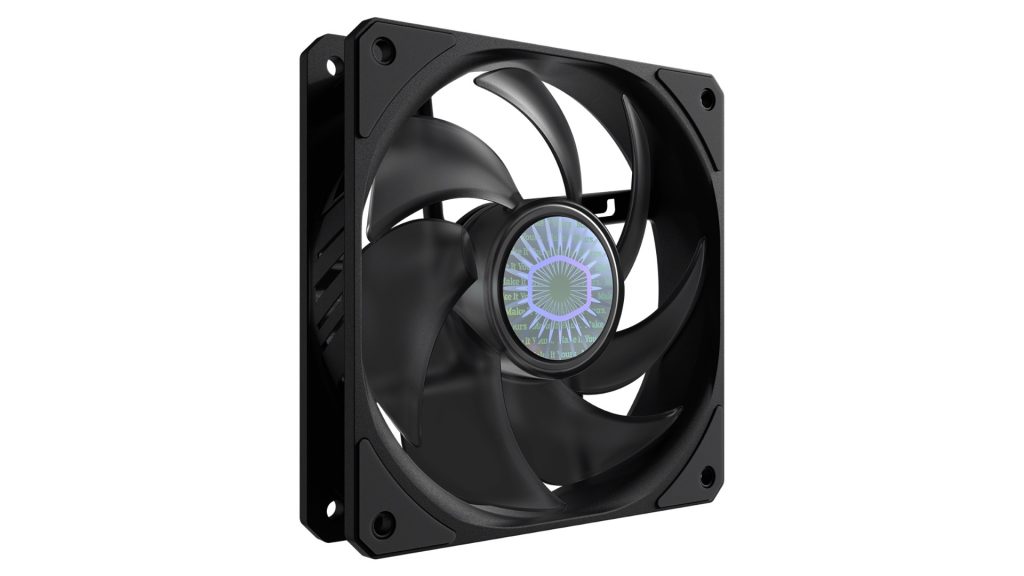
Fans | Cooler Master Sickleflow 120 | |
Total Price | ₹1,00,673 |
Graphics Card: ZOTAC GAMING GeForce RTX 3060 Ti Twin Edge (₹53,500)

The AMD Radeon RX 6000 series and the Nvidia RTX 3000 series are the latest gaming GPU lineups in the market and they are significantly faster than their predecessors. So, one thing is clear that we are going to opt for the latest GPUs even though they are costly, and we are going to cut down on the budget of other components.
Considering that we have got only ₹1,00,000, we have to look for the mid-range GPUs from both the brands, which happen to be the AMD Radeon RX 6600 XT and Nvidia RTX 3060 Ti. While both the GPUs cost almost the same money, the RTX 3060 Ti is significantly faster, in rasterisation as well as ray-tracing performance.
The Nvidia RTX 3060 Ti can run majority of AAA game titles at more than 120fps at 1080p resolution and highest graphics settings. These titles include Shadow of the Tomb Raider, Tom Clancy’s Rainbow Six Seige, DOOM Eternal, Death Stranding, Hitman 2, Resident Evil 3, and F1 2020, Assassin’s Creed Valhalla, Watch Dogs: Legion, Horizon Zero Dawn, and Cyberpunk 2077.
Owing to the semiconductor shortage, however, it is hard to find this (or any other) graphics card in stock. Fortunately, we found the ZOTAC GAMING GeForce RTX 3060 Ti Twin Edge in stock on Vedant Computers for ₹53,500. It is possible that the GPU will go out of stock from this online store by the time you read the article. However, from what we’ve gathered, you will be able to find the Nvidia RTX 3060 Ti in stock at other online and offline stores for almost the same price.
CPU: Intel Core i5-12400F (₹14,750)

With the graphics card taking more than 50% of our budget, we have to spend money on the CPU wisely. We need the most affordable processor that is powerful enough to keep up with the GPU. The cheapest processors to fulfil our requirements are the Intel Core i5-12400F and the AMD Ryzen 5600X. The one from team red costs upwards of ₹20,000 and doesn’t really fit our budget. The one from team blue, however, suits our budget perfectly. So, going with the Intel Core i5-12400F is the sensible choice here. It comes with a CPU cooler which is capable of keeping the temperatures under control even under sustained loads. Its cooler also has a pre-applied thermal paste.
Motherboard: MSI PRO B660M-A (₹13,350)

While motherboards for the Intel 12th Gen CPUs can be found for as low as ₹10,000, we wanted to get one that can run the CPU at its full potential under sustained loads. That means, it should have a good VRM design along with a capable thermal solution. We also want the motherboard to have four RAM slots and two M.2 SSD slots so that you can expand the memory and storage in the future.
The most affordable motherboard to fulfil these requirements is the MSI PRO B660M-A. It costs ₹13,350 on Electrobot. A few popular YouTube channels, such as the Hardware Unboxed and Premium Build, as well as a few publications have awarded the MSI Pro B660M-A as the best B550 motherboard overall. It is a tried and tested motherboard and is not known for any issues.
Apart from fulfilling all our requirements, the MSI PRO B660M-A offers a heat sink for one M.2 SSD slot which will save us some money when it comes to storage, an M.2 (Key E) slot which will allow you to add a Wi-Fi card in the future, and EZ Debug LED which will indicate which components aren’t working properly in case your PC doesn’t boot.
RAM: ADATA GAMMIX D30 DDR4 3,200MHz 8GBx2 (₹5,300)

When it comes to choosing memory for your PC, the first thing you need to consider is the capacity. Now, according to tests from popular YouTube channels, 8GB RAM is the bare minimum to carry out day-to-day tasks without any hiccups. However, it might not be enough if you decide to play graphics-intensive games. For that, you need 16GB RAM capacity. It strikes a perfect balance between price and performance. Note that you should use the memory in dual-channel configuration to utilise the CPU to its full potential. It means instead of getting a single 16GB RAM stick, we need to get two 8GB units.
The next thing you need to consider is the RAM speed. The DDR4 memory starts from 2,166MHz and goes all the way up to 4,400MHz. If you buy RAM which has a lower speed than what your CPU supports, you will not be able to utilise the processor to its full potential. Similarly, if you opt for RAM that is faster than what your CPU supports, you will not see any performance improvements (unless you overclock the memory using Z-series motherboards). So, the best way, at least in our case, is to go for the maximum RAM speed that is supported by the Intel Core i5-12400F, which is 3,200MHz.
With a price tag of ₹2,650, the ADATA GAMMIX D30 is the most affordable 8GB RAM stick with 3,200MHz frequency. Pairing two of these will set you back by ₹5,300. It is worth mentioning that the ADATA GAMMIX D30 comes with a heat-spreader for optimal thermal performance. A few of you might be thinking why didn’t we go with higher quality RAM modules. Well, the main reason is that we are tight on budget and we need to save every penny wherever we can without hurting the performance. Second, investing more on RAM will not give us enough returns for the extra money spent.
Storage: Kingstone NV1 500GB M.2 NVMe SSD (₹ 4,025)

When it comes to storage, you can either go for a hard disk drive (HDD) or a solid-state drive (SSD). While an HDD is more affordable compared to an SSD, it is also slow and unreliable. So, we think that spending extra money on an SSD is totally worth it. Having decided to go for an SSD, there are two options to choose from; you can either go for a SATA SSD or an NVMe SSD. The latter is almost three times faster while being only 10% to 15% costlier. So, it makes sense to choose an NVMe SSD any day.
As for the capacity, we think getting 500GB storage initially will be enough for your OS, all the basic applications, and a couple of AAA game titles. In case you run low on storage in the future, you can expand it by installing another M.2 SSD on your motherboard’s second M.2 SSD slot. Anyway, we went with the Kingston NV1 500GB M.2 NVMe SSD with four PCIe lanes. With a price tag of ₹4,025, it is one of the most affordable 500GB M.2 NVMe SSD in the market. It has 2,100MB/s read and 1,700MB/s write speed, which makes opening applications and transferring data a breeze.
PSU: Corsair CX650F (₹5,299)

The first thing you need to evaluate when choosing a power supply unit (PSU) is the power requirement of your PC. Considering the power consumption of the Intel Core i5-12400F and the Nvidia RTX 3060 Ti, a 450W power supply with an efficiency of more than 80% should be enough. However, to be on the safer side, you should always get a PSU that offers slightly more power than what your PC needs. So, going for a 500W or 550W power supply is a wise choice.
The second thing you need to look for is the quality of the PSU. How can you evaluate that? Well, a simple way is to go through the PSU Tier List 4.0 on Linus Tech Tips forum. This list mentions which power supplies are good and which are bad, based on expert and user reviews. The PSUs marked in golden colour are the best in thier price tiers. Apart from that, you can also watch and read reviews online to see if the PSU is up to the mark or not.
Considering the PSU Tier List 4.0, availability of power supply units in India, and our budget, the Corsair CX650F is our best option. It is the most affordable PSU on the PSU Tier List 4.0 that offers 450W or higher amount of power and has also been rated the best in its tier (for our budget). According to reviews, it uses high-quality components and manages voltage, ripple, and noise very-well.
As the name suggests, it has 650W rated power output. That is more than what we require but extra power never hurts. Plus, you can hook up a more power-hungry GPU to it in the future if you want to. Fortunately, the Corsair CX650F happens to be a fully-modular power supply. It means, it has no cables attached to it permanently. You can plug-in only the cables you want to the PSU which reduces the wire clutter inside your system.
Case: SilverStone FARA R1 (₹3,450)

There are a ton of PC cases in the market which makes choosing the best one quite a hectic task. Well, fortunately, we are here to do the heavy lifting for you.
Our main goal when choosing a PC case was to get one that has a good ventilation so that the CPU and GPU get enough air to breathe. The second thing is that the case should have a good build quality so that it doesn’t bend/brake while assembling the PC and also lasts long. Third, it should be spacious on the inside so that you can install components in it without any hassle. Last but not the least, it should have two USB Type-A 3.0 ports at the front so that you can transfer data from one storage drive to another quickly. After all, it is something that people do quite often.
The most affordable PC case to match our requirements is the SilverStone FARA R1. With a price tag of ₹3,450, it has a mesh panel at the front with support for three 120mm fans. Additionally, you can install a total of three fans at the top and the rear. So the airflow is sorted. Then there are two USB Type-A ports at the front, just like we wanted. Fortunately, it also has a PSU cover for a neat and clean look on the outside. So, that’s a bonus.
Case Fans: Cooler Master Sickleflow 120 x2 (₹1,050)

The Intel Core i5-12400F and the Nvidia RTX 3060 Ti in our build will generate quite a lot of heat inside the PC case. If the heat isn’t dissipated from the case quickly, there is a high possibility that the CPU and GPU will thermal throttle. So, it is necessary to offer them with enough ventilation. For this configuration and our budget, two intake and one exhaust fans will be enough to provide sufficient amount of air to the those components.
Since our PC case already comes with an exhaust fan, we need to get two intake fans. As we are tight on budget, we have to go for entry-level fans. The first thing that you need to look for when buying a case fan is its airflow, the higher the airflow number, the more amount of air it can pull inside the case. Secondly, you need to make sure that it is a PWM fan so that you can adjust the speed of your fan according to the thermals and preferred noise levels.
With a price tag of ₹525, the Cooler Master Sickleflow 120 is one of the most affordable PWM fans in the market. It also has one of the highest airflows among all the entry-level fans. So, it is a no non-sense choice for us. Getting two of these will set you back by ₹1,050. You can plug these fans directly to the four-pin fan headers on the motherboard and control the speed using the motherboard’s utility software.
Acquire Parts And Educate Yourself On How To Assemble The PC
Now that you know which products to buy and from where, the first thing would be to acquire all the parts. However, do check the prices of all the products on various websites and even offline stores before buying. It is possible that you might get a few products for a cheaper price at offline stores compared to online stores. We experienced this during our all-white gaming PC build.
Once you get all the parts, the next step would be to educate yourself on how to build a PC, in case you haven’t built one in the past. The best way to do that is to watch PC building videos on YouTube from popular channels like Gamers Nexus, JayZ Two Cents, and Linus Tech Tips. With that, you are now ready to build the best gaming PC under ₹1,00,000.
With all that said, we hope our article was helpful to you in building a gaming PC for around ₹1 lakh. If you like our guide and if you would like us to bring more such content, follow our Facebook, Instagram, and Twitter handles, and do reach out to us in the comments below.


Discussion about this post